Welcome to Picadilly & Company
Picadilly & Company, creating home decor knick knacks one party at a time. We provide you and your guests a fun evening creating a home decor items while in your home. It's a great venue for a Girls Night Out, family get together, etc. However, before we can create them in your home, I create them for my home. And there are some things I do, that I just cannot bring to someone's home. So, check out what I'm working on, maybe it will inspire you. To visit the company website, go to http://www.picadillyandcompany.com/
Currently I am preparing for our holiday homes tour. I will begin decorating for Christmas the day after Thanksgiving. In the meantime I am creating different projects to decorate with. So, the ideas I am sharing do not show the final stage often due to that. In December I will post pictures of the final outcome. Thanks for stopping by. And please, check out the website above!
Michelle
Currently I am preparing for our holiday homes tour. I will begin decorating for Christmas the day after Thanksgiving. In the meantime I am creating different projects to decorate with. So, the ideas I am sharing do not show the final stage often due to that. In December I will post pictures of the final outcome. Thanks for stopping by. And please, check out the website above!
Michelle
Showing posts with label wreath. Show all posts
11.25.2011
Button Wreath
I got this lovely idea from Pinterest. Out of courtesy I should share that it came from this website: http://gallopingpony.wordpress.com/2010/10/17/fall-retreat-2010/
I used a frame I have, I believe it is 14 x 14 and took the glass out.
I used a wreath I hade to make the circles as a guide to know where to put the buttons. However, I decided that it was to narrow and found something a little smaller to form a new inner circle. I used a 12x12 scrapbook paper.
I then simply hot glued all the buttons within the circle guides and then glued the bow on.
It's that simple.
11.17.2011
11.16.2011
Right on Target
Today's wreath is a little un-orthodox you might say. A few years ago my dad and I were commenting on how cool the Target Pharmacy medicine bottles were. I mentioned it might make a fun looking wreath. Well, he began saving them and well, I have enough to make at least two wreaths. I am considering hanging them in front of the window to have the daylight reflect through.
This is fairly simple. I used 27 pharmacy bottles. I took the labels off. However, the stickiness left behind isn't a concern, because they are all glued together. I hot glued them together and the angle of the bottle formed the circle. I applied the hot glue to the bottom inch or so of the bottle face. The tops don't touch real well due to the caps. Once it is all glued together, simply wrap a ribbon around and hang. NOTE: Since making this and it was hung in our window some of the hot glue sections did not hold. Not sure why. So I have repaired them using E6000 glue with better results.
I probably should make a disclaimer. I know some medicines should not be touched by anyone but the person taking them. So, be informed of what was in the bottles before proceeding to be certain. Also, I wouldn't allow children to handle the bottles. Wash your hands when done. If you have any concerns, ask your pharmacist.
11.14.2011
Jute Wreath
I really love natural colors with a touch of red for the holidays. This jute webbing used in reupholstering is right there with burap for me, natural and simple. I honestly thought making this wreath was going to be easier than it was. I first bought a wreath at The Dollar Tree. They are small and have 90 degree edges. Which actually made it more difficult. Here was the end result, not so pretty.
So I purchased this lovely piece at Goodwill for 99 cents. Foam isn't cheap and this was far better of a deal. I just not so gently cut off the fabric and had a new foam base to wrap the jute around.
I then used hot glue and carefully wrapped the jute webbing around the wreath base. I used 4 yards of webbing for this wreath. You have to get a tight wrap and it helps to cut slits in the edge of the webbing on the back side to get a tighter wrap.
The end result:
Paper Bag Wreath
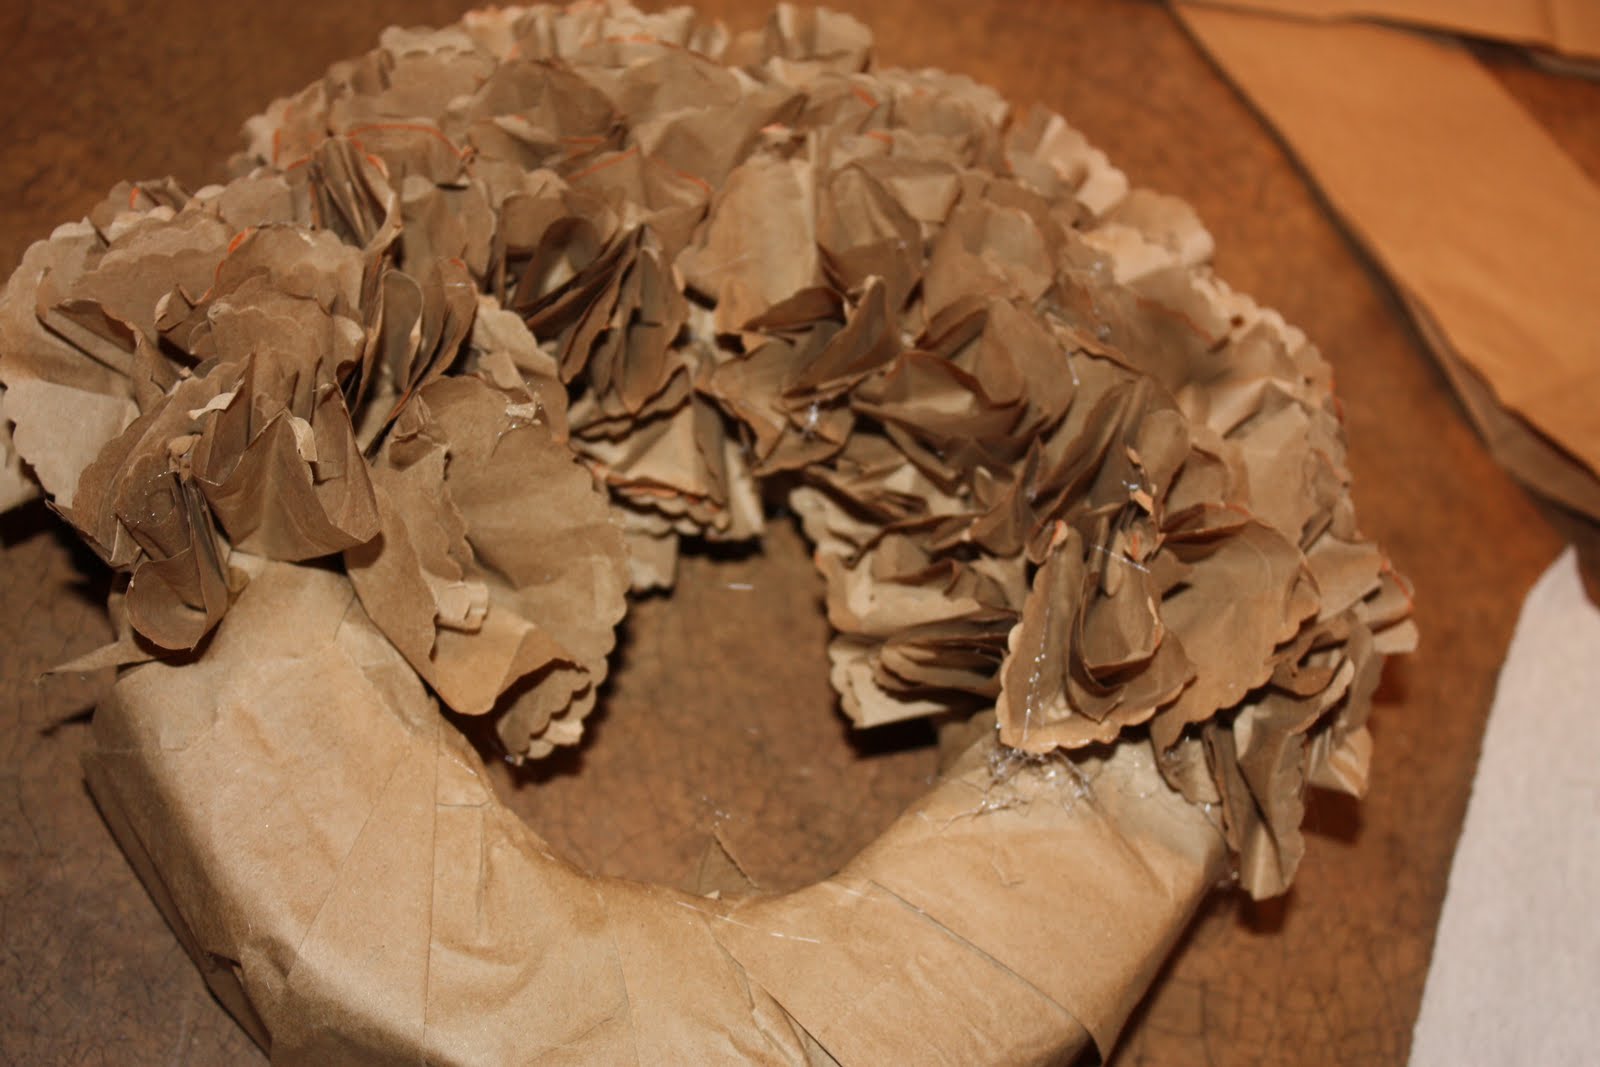
I LOVE, LOVE, LOVE, this wreath. I made it with one styro foam wreath base from the Dollar Tree. They are pretty small, which is probably good; because you cut a lot of circles from paper bags to fill it. Before I inserted all the circles, I wrapped the foam base with paperbag scraps to hide the green foam.
So, howwwww many circles you may ask, well, I don't want to discourage you by telling you, but I cut probably around 120 or soooooo 3" circles. I used some 'fancy' scissors with a scalloped edge to cut the circles.
I then used a dull pencil to loosely wrap each circle around and push into the wreath. Before I pushed the circle into the wreath, I put hot glue on the tip of it. I don't know if this is necessary, but I wanted to do it to make everything secure. I inserted the circles in the center, on top and the side of the wreath. Checking to make sure it was full and there were no holes periodically. It is not a flat surface and should be adorned utilizing the dimensions of the wreath.
Once I was satisfied with the amount of paper I used, I took a brown ink pad and scraped the edges of the bags with it. The dark brown contrast gave the wreath more dimension. On the picture below you can see that the left side does not have ink, and the right does. Also the circles I drew with pencil blended in better.

This is very easy to do and took a couple of hours or so.
Subscribe to:
Posts (Atom)